If you’ve been to any of the newer coffee shops around town, you’ve perhaps noticed that the pour over has become the standard preparation for coffee. If you just order a coffee, you’re going to get a pour over, not a 20-ounce cup of hot java pumped from a pot that’s been sitting there for who-knows-how-long.
But why is that? Why all the funnels lined up and filters and the funny kettles with long, curving spouts?
A pour over is a single-cup preparation of coffee: it’s prepared on the spot, from the coffee being ground to the brewing of it. In my mind – and I’ve been told this by several baristas – it’s one of the best ways to taste a coffee, to get a sense of its flavor profile without milk or sugar or other additives getting in the way. Because of the filter it’s cleaner than a shot of espresso or a French press. It’s also much more controlled than brewing with a drip machine. It’s about the closest you can get to a cupping, a professional tasting of coffee.
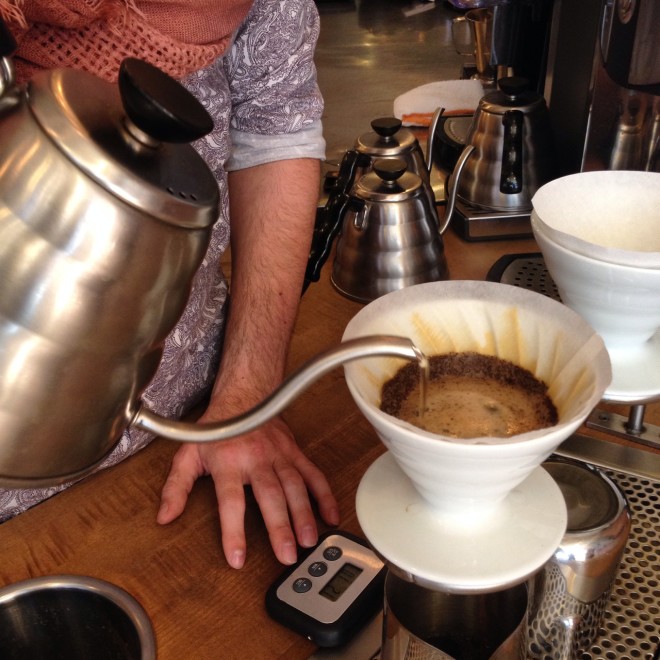
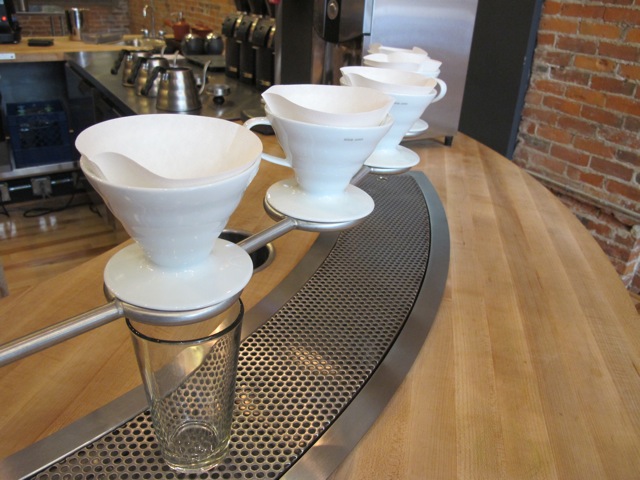
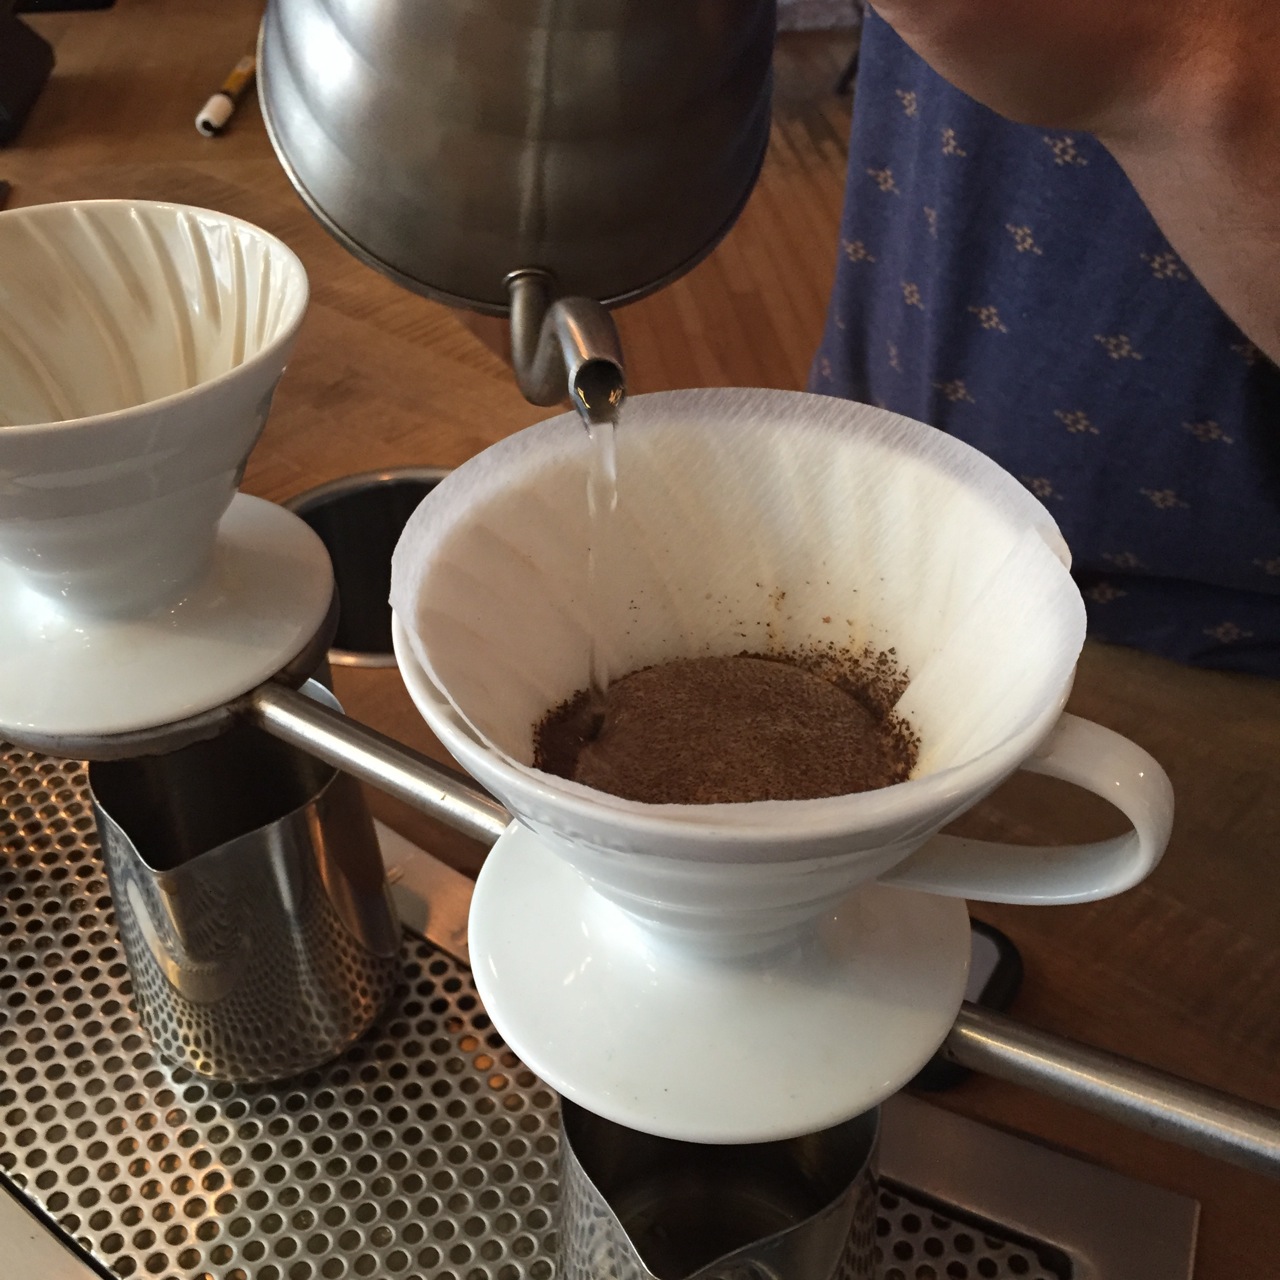
When you order a pour over, the beans are ground right then. They’re placed in a funnel that’s open at the bottom, with a conical paper filter. The grounds are then slowly sprinkled with hot water from a kettle, and the coffee drips out the bottom in the cup. The coffee-to-water ratio varies between 1/12 and 1/14 (grams, that is). So 25 grams of ground coffee translates into a cup of about 300-350 grams of water. (Obviously different shops vary their exact ratios; they often test their roasts to find the best ratio for each one.)
The result is a very clean and flavorful cup of coffee. I love a good pour over because you’ll taste the coffee in ways you never have before. One of my favorite experiences with a pour over coffee is sticking my nose into the mug right after it’s made.

I remember talking to Jeff Excell at Fox in the Snow Cafe about pour overs, and he said he liked it because it took a little more time (but was still pretty fast) and encouraged some interaction between barista and customer. I’m all about this. We can wait the extra couple minutes to make the coffee; it’s a good chance to connect with the people around you.
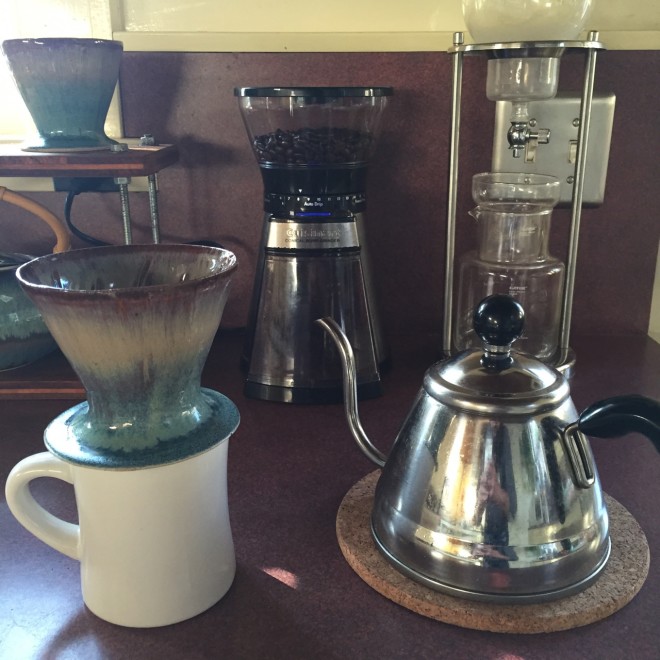
Although it takes some practice, you can make very good pour overs at home. They’ve become our standard preparation for coffee. It’s not too difficult to learn, although you do need the right equipment, namely:
1. a burr grinder (so you can control the grind of your beans – absolutely necessary)
2. a pour over funnel (like the beautiful ceramic ones Mrs. Breakfast With Nick makes!)
3. a drip kettle with a thin spout (to control the water flow – I’ve tried it with a regular kettle and it was disastrous)
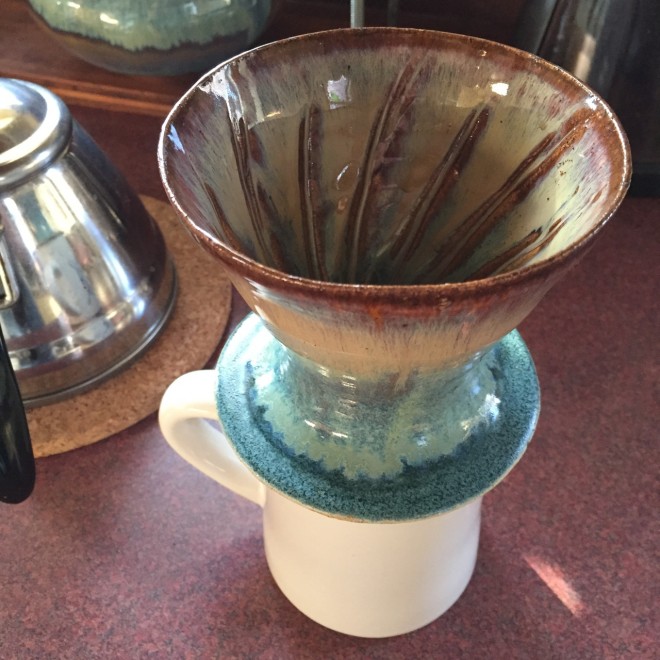
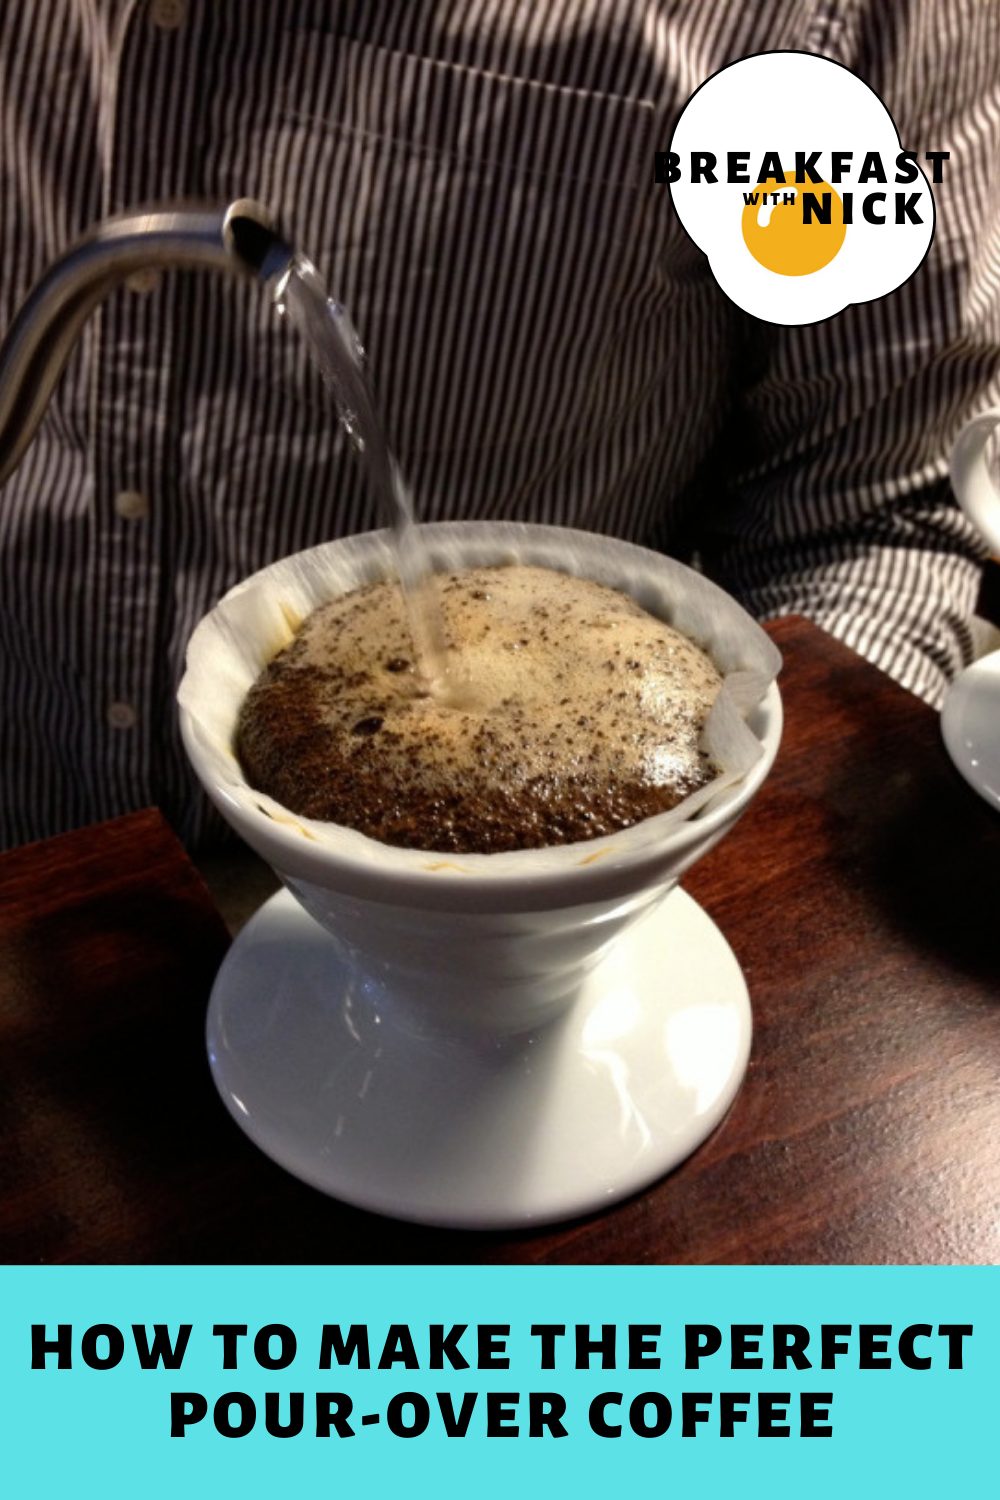
Let’s just take a moment and admire Mrs. Breakfast With Nick’s ceramic funnel. Mick from One Line Coffee helped her shape these.
The process is fairly straightforward:
1. Boil water in your kettle; set your funnel on top of a large mug, and place both on a digital scale
2. Take the kettle off the burner and let it sit: you want the water temp to be a little below boiling point
3. While you do that, grind your beans. You want a medium coarse grind; someone once described it as looking like bread crumbs. I’ve found setting 8 on my Cuisinart grinder gets the best results. Again, I go for about 25 grams of coffee.
4. Place your filter in the funnel and wet it down completely with water from your kettle. This does three things: a.) it gets the filter to adhere to the sides of the funnel, b.) it warms the filter and mug to ensure even temperatures throughout the whole extraction process, and c.) it washes away any excess paper fibers.
5. Once the water has drained from the funnel to the mug, dump it out, pour your coffee grounds into the filter, and zero your scale.
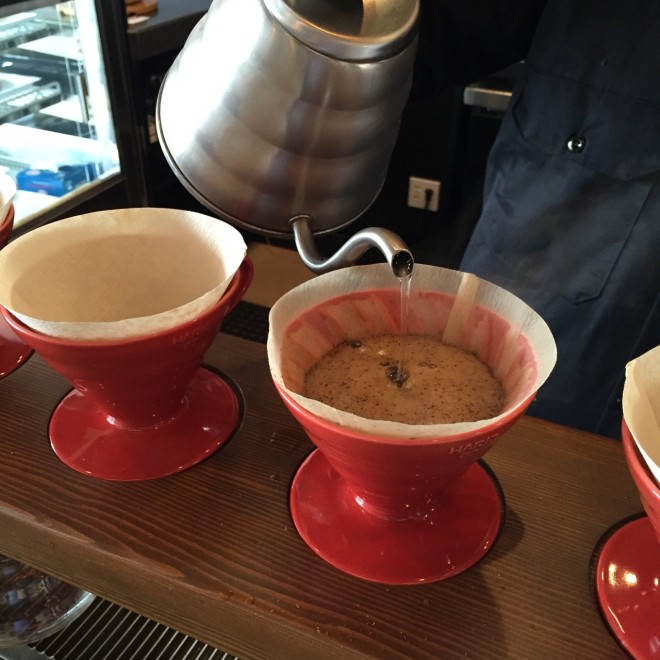
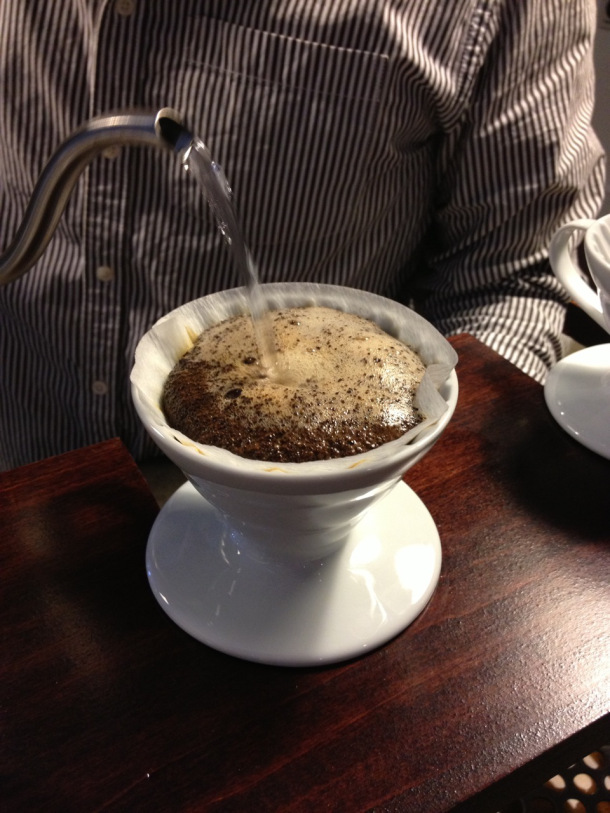
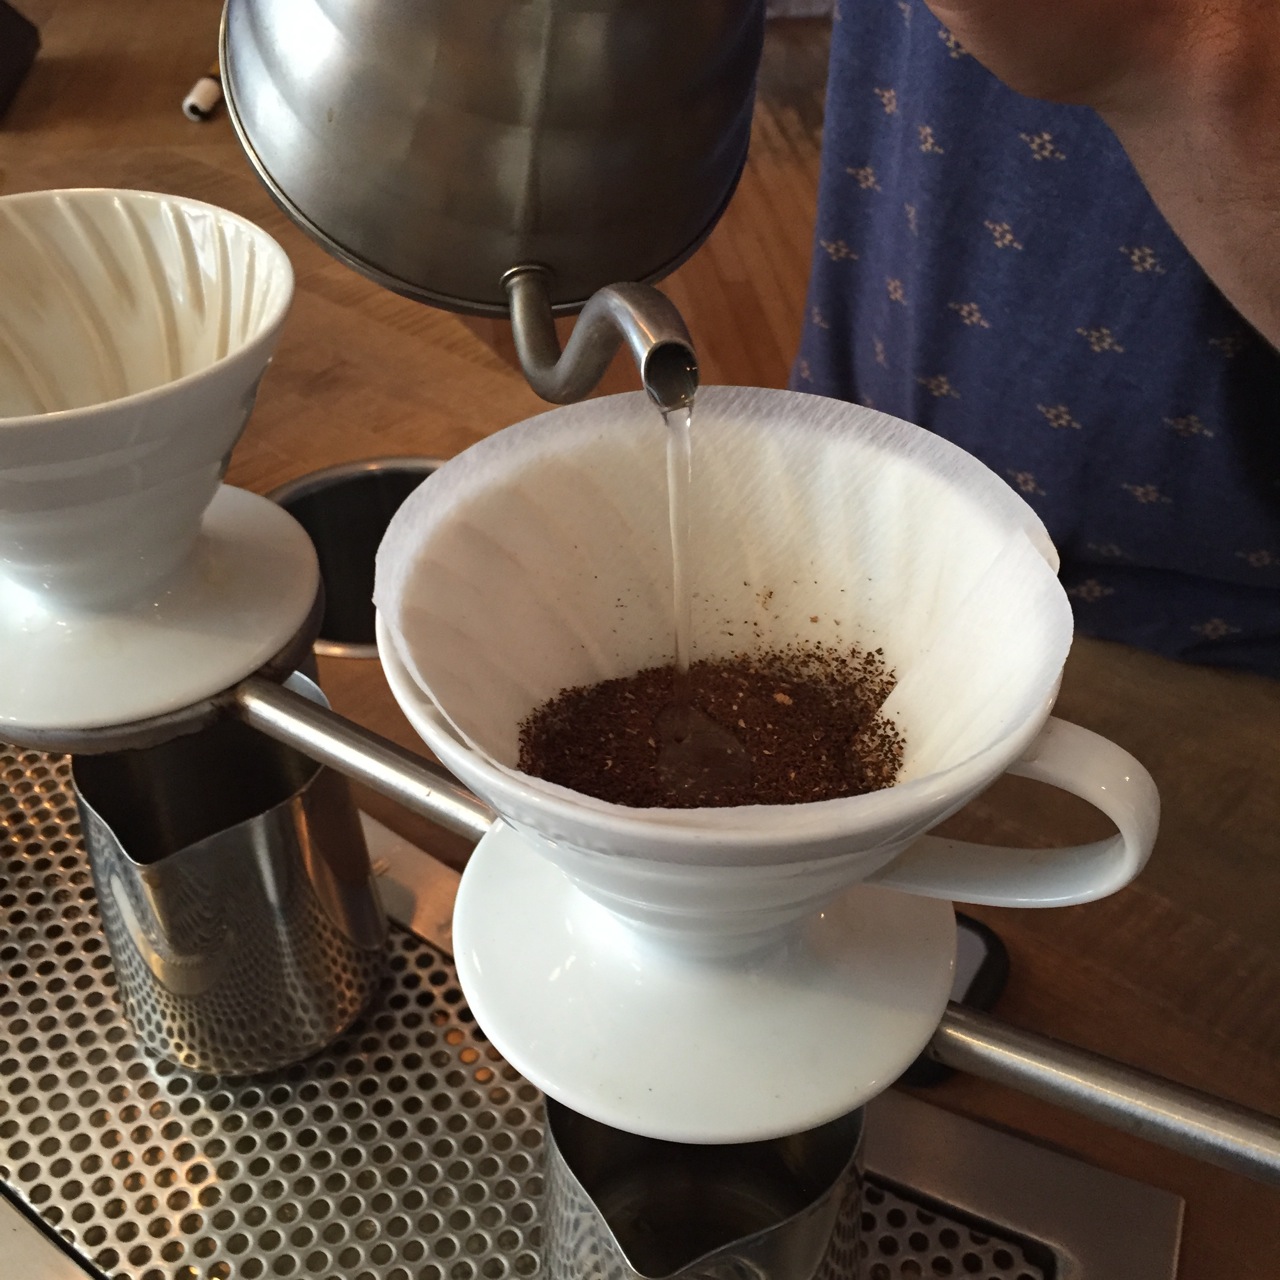
6. Using your kettle, pour about 50 grams of water onto the grounds (watch your scale). Use a circular motion to soak the grounds evenly. Then let it sit for 30 seconds. You’re doing this so the water can soak the grounds evenly. This prevents the rest of the water from channeling straight through. You’re also letting it sit because those freshly ground beans are expressing gasses, and you’re giving them a chance to escape. You’ll see how the grounds foam up beautifully; this is called blooming.
7. After the 30 seconds have passed, continue to soak the grounds evenly with the rest of your water. (I do 25 grams of coffee x 14 = 350 grams of water.) The key is the even saturation. You can’t let the grounds dry out, so don’t walk away. Keep pouring the water in a circular motion. A few baristas have shared that the lighter foam on top shows were the coffee is being more heavily extracted, so you should pour onto spots with darker foam. Again, this helps with even extraction from the coffee grounds.
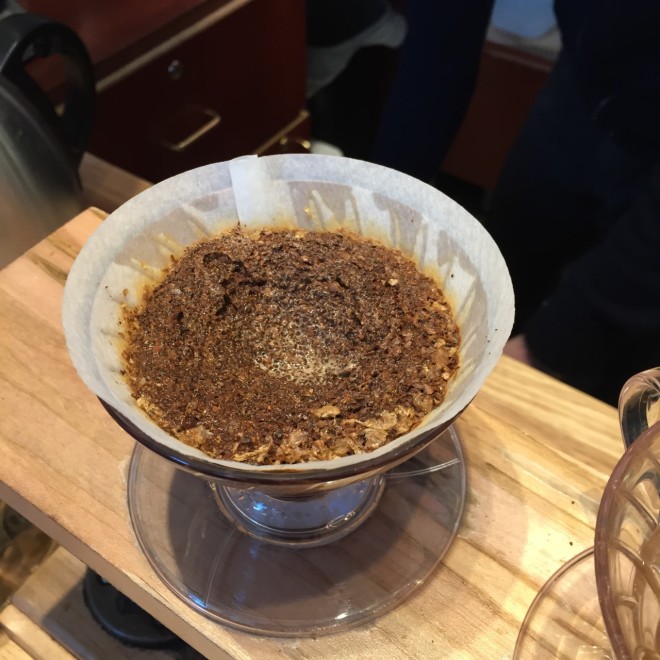
8. Once you’ve hit your final weight, stop pouring and give the water time to filter all the way through. Then toss the filter and used grounds (better yet – throw them in the compost), rinse out your funnel, and you’re ready to enjoy!
If you’ve never ordered a pour over before, give it a try, especially if you prefer a black cup of coffee over espresso drinks and other fancier preparations. It’s one of the best ways to experience a coffee shop’s offerings.
And if you’re really into pour overs, try making them at home. It takes some practice (I’ve been doing it for a year and am nowhere near the expertise of professional baristas), but it’s a good reminder to take a little extra time and enjoy the process as well as the product.
(Thanks to the folks from One Line Coffee, Fox in the Snow, and Crimson Cup for the tips and info on pour overs!)